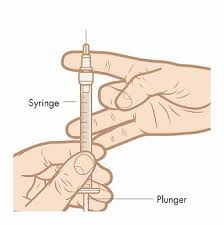
Fluid formulators often package their products in 3cc, 5cc, 10cc or 30cc syringes. This is so that the package (a syringe) is able to be used on their dispensing unit. Regardless of however careful the formulators are in trying to keep air bubbles from seeping in during filling, the end user usually has to take steps to purge any remaining air pockets from the syringe. Also, when transferring fluid from its original packaging or when two or more fluids are mixed, it can result in air bubbles being entrapped in the syringe. These air bubbles should be removed in order to ensure the accuracy of the dispense.
Below are three ways to remove the air bubbles from the syringe before dispensing the fluid:
Tapping the Syringe
Manually tip the syringe upwards in the air (like a doctor would) and tap the syringe. Let the bubbles rise. The luer lock tip cap is then removed and the piston is pushed up slowly, in a manual mode, to remove any large bubbles that appear and purge them out through the tip.
Put the Syringe in a Centrifuge
This is the most common way to remove air bubbles or air pockets from a syringe. A syringe is filled with the piston in place, taking note that the front seal of the piston is maintained; the fluid should not permeate the seal and flow into the mid-section of the piston. Install a tip cap and barrel storage cap. Place the syringe in a centrifuge, tip down. The centrifuge should remove all tiny bubbles that may exist in the fluid.
Typically, a few minutes at medium RPM is adequate to completely remove the air. A visual inspection by an experienced operator is usually a good enough measure of success. Most centrifuges for industrial use have a range of RPM and a range of time. The parameters that are chosen depend upon the size of the syringes and the adhesive properties.
Put the Syringe in a Vacuum Chamber
A vacuum chamber is a sealed piece of equipment that is operated by a vacuum pump.
To begin, put your fluid into the vacuum degassing chamber and adjust the air pressure so that it is lowered. As this air pressure evacuates, the air bubbles which were formed will expand, rise to the surface and burst. Vacuum degassing causes the fluid to expand to about two to six times its original volume before it starts to decline. Depending upon the fluid itself, the process may take a few minutes or several minutes before the purging is complete.
It’s important to put the syringe in the vacuum chamber for a short period of time. Too much time in the chamber will have the opposite of the desired outcome and add air bubbles to the fluid.
The above methods work well for most fluids, however, RTV silicone entraps large amounts of air pockets, making the fluid very compressible. Centrifuging or degassing the silicone will not significantly improve this condition. The result of this now highly compressed fluid makes it difficult to dispense.
For pneumatic dispensers, this results in the operators typically ramping up the air pressure, resulting in deteriorating the fluid and dispense even more! If you are using an AirFree® SmartDispenser® it results in an extremely long stroke length, forward steps plus reverse steps, whereas short stroke lengths provide the best performance.
However, there is a solution for the AirFree®; Back-off Delay Mode is an option available in Traditional LDS9000® Mode and ProcessControl2™ Mode. This feature is designed for RTV silicone and allows this very compressible and difficult fluid to be dispensed with a much higher repeatability, from one dispense to the next, than pneumatic dispense systems can deliver.
By activating Back-off Delay Mode the additional time between forward and reverse motion drastically reduces stroke length by allowing the fluid to flow, for the added seconds, reducing internal syringe pressure.
Do you need more assistance with how to do this, or have any questions about our products? Please contact Fishman Corporation and someone will assist you.
